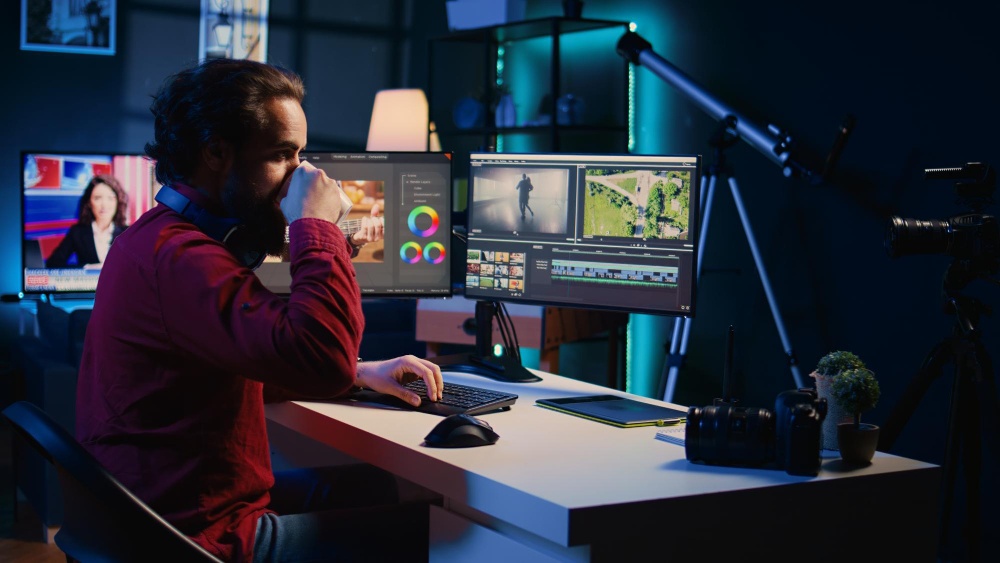


Lens flare, once considered an optical imperfection, has evolved into a sought-after effect in photography, adding drama, depth, and a touch of magic to images. With the advent of advanced editing tools like Photeeq Lens Flare, photographers can now artfully incorporate and control this phenomenon to enhance their visual storytelling. This comprehensive guide delves into the intricacies of lens flare, the capabilities of Photeeq Lens Flare, and practical steps to master this effect in your photography.
Understanding Lens Flare
Lens flare occurs when non-image-forming light enters the camera lens and interacts with its internal components, leading to reflections and scattering. This interaction manifests as streaks, circles, or other light patterns within the image. While traditionally seen as a flaw, intentional use of lens flare can imbue photographs with atmosphere, warmth, and a sense of realism.
Types of Lens Flare
- Sunburst Flare: Radiant light beams emanate from a central source, ideal for outdoor photography during golden hours.
- Starburst Flare: Sharp, multi-pointed light rays, best suited for night photography or capturing artificial lights.
- Halo Flare: A circular glow around the light source, adding a dreamy, surreal quality to portraits or landscapes.
- Anamorphic Flare: Streak-like light patterns, often used in cinematic photography to create a sci-fi or futuristic vibe.
Factors Influencing Lens Flare
Several elements affect the presence and characteristics of lens flare in photographs:
- Focal Length: Shorter focal lengths can minimize lens flare, while longer ones might increase it.
- Lens Quality: High-quality lenses with multi-coating technology reduce reflections and glare, producing superior images even with lens flare effects.
- Cleanliness: Maintaining clean lenses reduces reflections and glare flares.
- Filters: High-end filters can significantly reduce problems with lens flare.
- Lens Hoods: Minimize lens flare caused by stray rays of light.
- Lens Elements and Design: The number and design of lens elements can impact the presence of lens flare.
- Multi-Coatings: Multi-coated lens elements can minimize lens flare.
also read: https://altyba.com/lovelolablog-news/
Introducing Photeeq Lens Flare
Photeeq Lens Flare is a specialized software designed to help photographers add realistic and customizable lens flares to their images during post-processing. It offers a range of features that make it a powerful tool for enhancing photographs.
Key Features
- Realistic and Customizable Effects: Photeeq uses advanced algorithms to create lens flares that mimic real light sources. Users can adjust the shape, color, intensity, and position of the flare to suit their artistic vision.
- Seamless Integration: The software integrates with popular post-processing tools like Adobe Photoshop and Lightroom, allowing for a smooth workflow.
- Extensive Preset Library: Photeeq comes with a vast library of presets, enabling users to apply various lens flare styles with a single click.
- Interactive Placement: Users can interactively place and adjust the lens flare on their images, ensuring seamless integration with the composition.
Applying Photeeq Lens Flare in Post-Processing
Incorporating Photeeq Lens Flare into your post-processing workflow is straightforward:
- Open Your Image: Start by opening your photograph in your preferred post-processing software.
- Launch Photeeq Lens Flare: Access Photeeq from the plugin menu.
- Select a Preset or Customize: Choose a preset from Photeeq’s library or create a custom lens flare by adjusting parameters like intensity, size, position, and color.
- Place and Adjust the Flare: Interactively position the lens flare on your image, fine-tuning its appearance to achieve the desired effect.
- Finalize and Save: Apply the changes and save your edited image.
Tips for Creating Stunning Lens Flares with Photeeq
To maximize the impact of lens flares in your photography:
- Experiment with Angles: Slightly altering your shooting angle relative to the light can introduce subtle flares without overwhelming the frame.
- Choose Your Light Source: Sunlight works well for creating natural flare, especially during golden hour when the light is softer and more diffused.
- Use Aperture Creatively: Shooting at a higher f-stop number can bring out the flare in distinct, geometric patterns.
- Block Part of the Light Source: Using objects (like tree branches) to partially obscure the light source can create interesting and manageable flare.
Comparing Photeeq Lens Flare to Other Tools
Photeeq Lens Flare distinguishes itself from other lens flare tools through its superior customization options and ease of use. While many tools offer basic adjustments, Photeeq provides in-depth control over flare behavior, including color, shape, and layering, catering to both novice and advanced users.
Enhancing Various Photography Genres with Photeeq Lens Flare
Photeeq Lens Flare can be applied across different photography styles:
- Landscape Photography: Add a magical or dramatic quality, especially during sunrise or sunset, by replicating the effect of the sun peeking through trees or mountains.
- Portrait Photography: Introduce a soft glow to the background, creating depth and ambiance, while casting a warm, flattering light on the subLens flare, once considered an optical imperfection, has evolved into a sought-after effect in photography, adding drama, depth, and a touch of magic to images. With the advent of advanced editing tools like Photeeq Lens Flare, photographers can now artfully incorporate and control this phenomenon to enhance their visual storytelling. This comprehensive guide delves into the intricacies of lens flare, the capabilities of Photeeq Lens Flare, and practical steps to master this effect in your photography.
- Understanding Lens Flare
- Lens flare occurs when non-image-forming light enters the camera lens and interacts with its internal components, leading to reflections and scattering. This interaction manifests as streaks, circles, or other light patterns within the image. While traditionally seen as a flaw, intentional use of lens flare can imbue photographs with atmosphere, warmth, and a sense of realism.
also read: https://altyba.com/prohibujo-png-discover-the-power-of-unique-digital/
Types of Lens Flare
- Sunburst Flare: Radiant light beams emanate from a central source, ideal for outdoor photography during golden hours.
- Starburst Flare: Sharp, multi-pointed light rays, best suited for night photography or capturing artificial lights.
- Halo Flare: A circular glow around the light source, adding a dreamy, surreal quality to portraits or landscapes.
- Anamorphic Flare: Streak-like light patterns, often used in cinematic photography to create a sci-fi or futuristic vibe.
Factors Influencing Lens Flare
- Several elements affect the presence and characteristics of lens flare in photographs:
- Focal Length: Shorter focal lengths can minimize lens flare, while longer ones might increase it.
- Lens Quality: High-quality lenses with multi-coating technology reduce reflections and glare, producing superior images even with lens flare effects.
- Cleanliness: Maintaining clean lenses reduces reflections and glare flares.
- Filters: High-end filters can significantly reduce problems with lens flare.
- Lens Hoods: Minimize lens flare caused by stray rays of light.
- Lens Elements and Design: The number and design of lens elements can impact the presence of lens flare.
- Multi-Coatings: Multi-coated lens elements can minimize lens flare.
- Photeeq Lens Flare is a specialized software designed to help photographers add realistic and customizable lens flares to their images during post-processing. It offers a range of features that make it a powerful tool for enhancing photographs.
- Key Features
- Realistic and Customizable Effects: Photeeq uses advanced algorithms to create lens flares that mimic real light sources. Users can adjust the shape, color, intensity, and position of the flare to suit their artistic vision.
- Seamless Integration: The software integrates with popular post-processing tools like Adobe Photoshop and Lightroom, allowing for a smooth workflow.
- Extensive Preset Library: Photeeq comes with a vast library of presets, enabling users to apply various lens flare styles with a single click.
- Interactive Placement: Users can interactively place and adjust the lens flare on their images, ensuring seamless integration with the composition.
Applying Photeeq Lens Flare in Post-Processing
- Incorporating Photeeq Lens Flare into your post-processing workflow is straightforward:
- Open Your Image: Start by opening your photograph in your preferred post-processing software.
- Launch Photeeq Lens Flare: Access Photeeq from the plugin menu.
- Select a Preset or Customize: Choose a preset from Photeeq’s library or create a custom lens flare by adjusting parameters like intensity, size, position, and color.
- Place and Adjust the Flare: Interactively position the lens flare on your image, fine-tuning its appearance to achieve the desired effect.
- Finalize and Save: Apply the changes and save your edited image.
Tips for Creating Stunning Lens Flares with Photeeq
- To maximize the impact of lens flares in your photography:
- Experiment with Angles: Slightly altering your shooting angle relative to the light can introduce subtle flares without overwhelming the frame.
- Choose Your Light Source: Sunlight works well for creating natural flare, especially during golden hour when the light is softer and more diffused.
- Use Aperture Creatively: Shooting at a higher f-stop number can bring out the flare in distinct, geometric patterns.
- Block Part of the Light Source: Using objects (like tree branches) to partially obscure the light source can create interesting and manageable flare.
Comparing Photeeq Lens Flare to Other Tools
- Photeeq Lens Flare distinguishes itself from other lens flare tools through its superior customization options and ease of use. While many tools offer basic adjustments, Photeeq provides in-depth control over flare behavior, including color, shape, and layering, catering to both novice and advanced users.
- Enhancing Various Photography Genres with Photeeq Lens Flare
- Photeeq Lens Flare can be applied across different photography styles:
- Landscape Photography: Add a magical or dramatic quality, especially during sunrise or sunset, by replicating the effect of the sun peeking through trees or mountains.
- Portrait Photography: Introduce a soft glow to the background, creating depth and ambiance, while casting a warm, flattering light on the subject’s face.ject’s face.
FAQs
What Causes Lens Flare in Photos?
Lens flare occurs when a bright light source, such as the sun, enters the lens and reflects between the lens elements. This scattered light reduces contrast and can appear as haze or light artifacts.
How Can I Use Lens Flare Creatively?
To use lens flare as a creative effect, shoot towards a light source, like the sun, during the golden hour. Adjust your angle and aperture to capture the desired flare shapes or warmth.
Can Lens Flare Be Removed in Editing?
Yes, lens flare can be reduced or removed in post-production using tools like the spot healing brush, clone stamp, or adjustments in brightness and contrast in software such as Lightroom or Photoshop.
Do Lens Hoods Always Prevent Lens Flare?
Lens hoods help reduce lens flare by blocking stray light, but they don’t guarantee flare-free photos, especially if you’re shooting directly into a light source.
Conclusion
While lens flare might initially seem like a nuisance, it can be an incredibly versatile element in photography. By understanding the types of lens flare and how it interacts with your camera, you can control this phenomenon to match your creative goals. Whether you’re capturing serene landscapes, dynamic wildlife, or simply experimenting with light, lens flare can add depth and atmosphere to your work.